Monthly Archives: August 2011

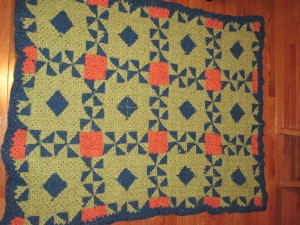
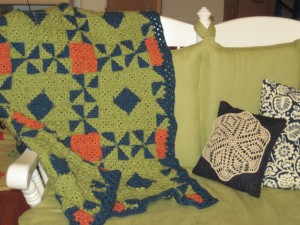
My very first afghan!

Standard

…and what an awful one to pick to do! I always see something, know I have the talent and get started on it without remembering my complete and total lack of patience. The women over at the have significantly more time and patience on their hands than I do so I have to give them a hand for these beautiful patterns and making them simple enough for even me to understand!

I hope you enjoy! It took me about two months working on this off and on to complete what I have here. I think I’m going to do the edge a little wider. I think I’ve decided on adding two green stripes, a blue, a pink, and then another blue and it should be good. I’m doing this because I apparently crochet like my underwear’s in a knot and my gauge is a total large block too small 0.0; This is what I get for starting it on a road trip without a ruler huh?

Anyway, check mine out and then hop on over to the Happy Yellow House!

Also, funny story, but I totally didn’t do this on purpose. I bought the yarn long before I started on the furniture and it when I did start on it, it was while I was taking a break on the blanket. Also, the two were never really out in the same room until I moved and then I noticed. I promise I’m not absolutely obsessed with the color green… >.<
Braided Rag Rug

Standard

Alright, so what do we do with A LOT of left over fabric? We use it. We use a yard to make a pillow, or a quarter to make a stuffed animal. So after several suggestions I decided I would try my hand at making the braided rag rug suggested by Crochetycrochetlady. Other than the fact that it was a PAIN IN THE BUTT, I think it’s coming along nicely :).

If I were to ever do this project again, I would use double sided fabric that didn’t fray. It would not only have been finished SIGNIFICANTLY sooner but I wouldn’t have ran out of the 6 spools of green thread that I had to buy so that my strips would have finished edges…and still need to go out and buy more. That is, however, the only expense I had for this project. I already had all of the fabric necessary for the project (unfortunately it didn’t use up nearly enough :P) and I braid like speed demon so no problems there.

So what do you need for this project?

About 5 yards of fabric cut into 1″ strips
A clothes pin
Safety Pins
thread to match your fabric
invisible thread
a sheet of fabric the shape and size of your finished rug

To begin, sew three strips together into a “T.” I stitched up to 12 of my cut strips together at a time so I could spend some time sewing and then time braiding however, in order to do this roll up one of the three tails and secure it with the clothes pin so you don’t end up with a tangled mess on your hands. So braid away. I made an oval rug and it took me a minute to think about it but it made sense that however long you make the center strip is the difference between the length and width of the finished project. So, if you want a 3’x5′ rug you need your center strip to be 2 feet long. Mine was just under three feet long so mine finish project will be roughly 5’x 2′ or 6’x3′ depending on how much I want to do. In order to make such a tight turn for the first couple rounds skip a couple strands in the braid. I know that doesn’t really make any sense but I’ll post a picture tomorrow. I have a book that has an absolutely beautiful diagram of it.

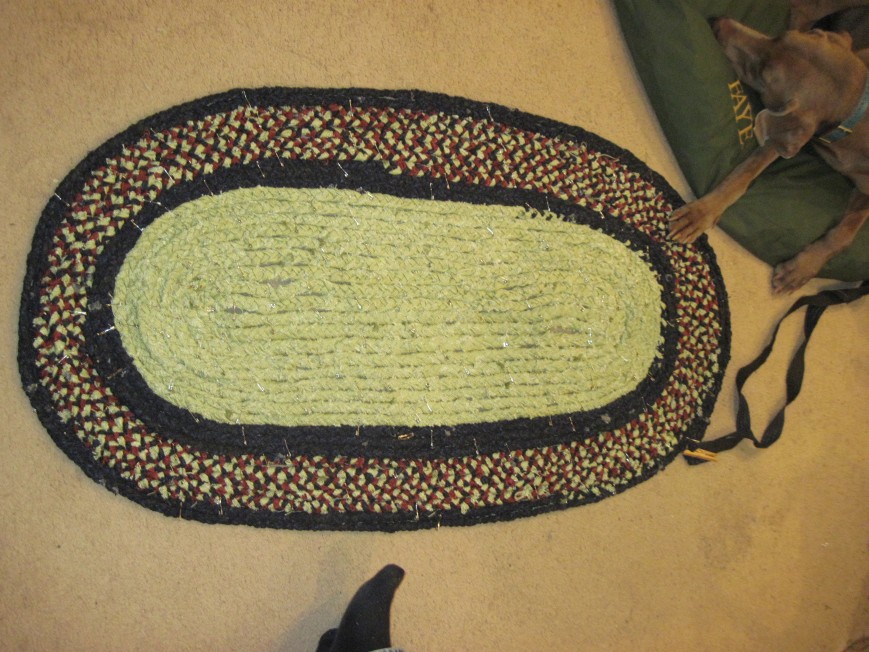
Anyway, after the first couple rounds you don’t need to do any special braiding and can just make a straight regular braid. After I had roughly 52 yards [give or take, I used the very scientific fingertip to nose method of measuring (which I actually measured once and was actually pretty accurate for my arm length)] I wrapped it up and safety pinned it so that I could see about how large my rug is and this is what I ended up with.

That’s Daggett, he stole his sister’s bed and she’s not too happy about it but he’s helping me by holding that corner together. ><

He looks so innocent…BAH has he got you fooled!

Now I’m going to add a little more green around the outside edge because I think I have something like 30 or 40 more strips cut already. Then I should be done. As for size, I think it’s almost 5’x2′. By the time I get the rest of my already cut strips on it’ll be about 5.5’x2.5′. We’ll see how it looks again then.


When I do get finished with my braid, I’m going to take my rug sized fabric and finish the edges. Then, I will sew it all together, starting in the center and working clockwise with the invisible thread using the zig-zag stitch.ย  We work clockwise so theย  rug won’t get jumbled up in the sewing machine arm.

I’ll post pictures when I’m done, I just wanted you all to know I wasn’t being a TOTAL bum ๐Ÿ˜›


Beyond The Picket Fence

Awesome Doily Idea

Standard

So this is mainly for crochetycrochetlady, but I figured everyone else would like it too. SO LOOK WHAT I FOUND ONLINE LAST NIGHT! I’m definitely going to tackle this one sometime this fall. Instead of making a rug though (I feel like the rope lights might be hard on your feet) I’m thinking wall lighting. It’d be like those recessed ceiling lights or back lit canvases. I think it’d be great.

LOVE

It’s Razzmatazz in every language

Standard

I wanted to make another crayon wax art canvas but longer than the first so I could get the full effect of the little drips.ย  So I went to A.C. Moore and their canvas was on sale for 50% off YAY!

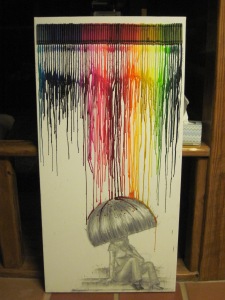
This is what I ended up with. The drips didn’t quite go as far as I wanted and while I was trying to figure out what to do with the rest of the canvas I thought the drips looked most like rain! So I drew a little lady with an umbrella with charcoal and melted the drips again so that it would run down the umbrella. Let me know what you think!

Her foot’s a little dark so I might go back over the whole thing and make it darker. We’ll see.

Crayons

Standard

I like to post to blog parties. Recently I’ve seen a lot of posts about crayon wax art referring to something they’d seen on Pinterest but not giving credit to the artist. So I looked up favorites on Pinterest and found the real inspiration: http://www.etsy.com/shop/JKCreate Definitely cool, but I’m thinking $70.00 is a little outside of my wall art budget. So seeing how I always have crayons and canvas laying around and I kidnapped my fiance’s heat gun, I decided to make my own.

I first spray painted my canvas with Krylon Black Spray Paint. Then, I hot glued my crayons in order to my canvas so that they’d be relatively straight.

After I started heating, it took about 5 minutes to get the drippy effect I wanted. Check it out, what do you think?

Lamps to match!

Standard

I bet you guys didn’t think I was doing anything with my crafty summer, well I’ll prove you wrong!

Check out these awesome lamps I painted to go with my new(ish) furniture.

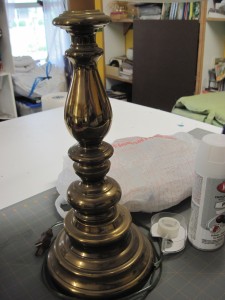
I found these great lamps in the garage today. The brass is a good look but I was looking for something a little brighter and more fun so I got to thinking and since I’m creating a living room from scratch I figured I’d make lamps to match so I looked through my materials and had everything for this project except the primer!

Two lamps to match my room for the cost of a can of spray primer ~$4!

What you’ll need for this project:

Lamps
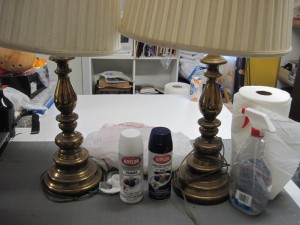
Krylon Primer (I used white)
Krylon Paint (I used Regal Blue)
plastic bags
tape
cleaner
paper towels

I washed off my lamps with a little Windex, brass cleaner would’ve been better but I didn’t have any handy and I just wanted to get the dust off anyway.

Don’t they have the best shape?

I then covered everything I didn’t want painted in plastic bags and taped them shut and to the lamp.

Now cover the thing in primer! It was probably a little too windy for me to do this today but I’m stubborn like that >.<

They kept their class through the primer didn’t they? I almost kept them white but then I remembered they’d be sitting next to a white couch and chair and on a white table… nah, they needed to be blue.

So I let the primer dry, it only about 15 minutes to be dry to the touch but I let it sit for about an hour.

Now for the blue!

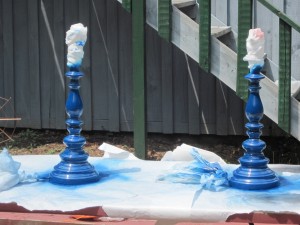
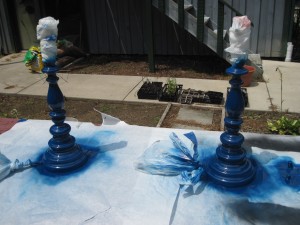
This was easier said than done. I thought I had finished the whole thing and sat down and was looking again and the undersides of all of those curves were still white :/ (whoops!)

First coat

second coat…

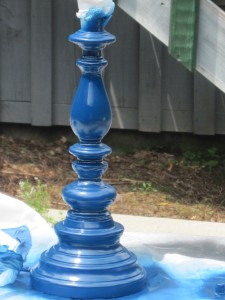
up close!

Ta da! All done! I also love three way bulbs, and I’m all for saving the universe but I hope the government brings back regular light bulbs. ๐Ÿ˜ฆ

Oh, I was also down in the barn (these were up on the old picnic table) and it started raining. I completely forgot they were outside, but when I got back the bags had protected the electrical components and the lamps were dry so the rain didn’t bother them at all.

Anyway, not only was this project inexpensive, it was quick and extremely easy. Before you throw your old lamps out, think about anywhere that could use a lamp and then MAKE them match your decor! ๐Ÿ™‚